Installation Guide
- Install the Simpler Checkout Module
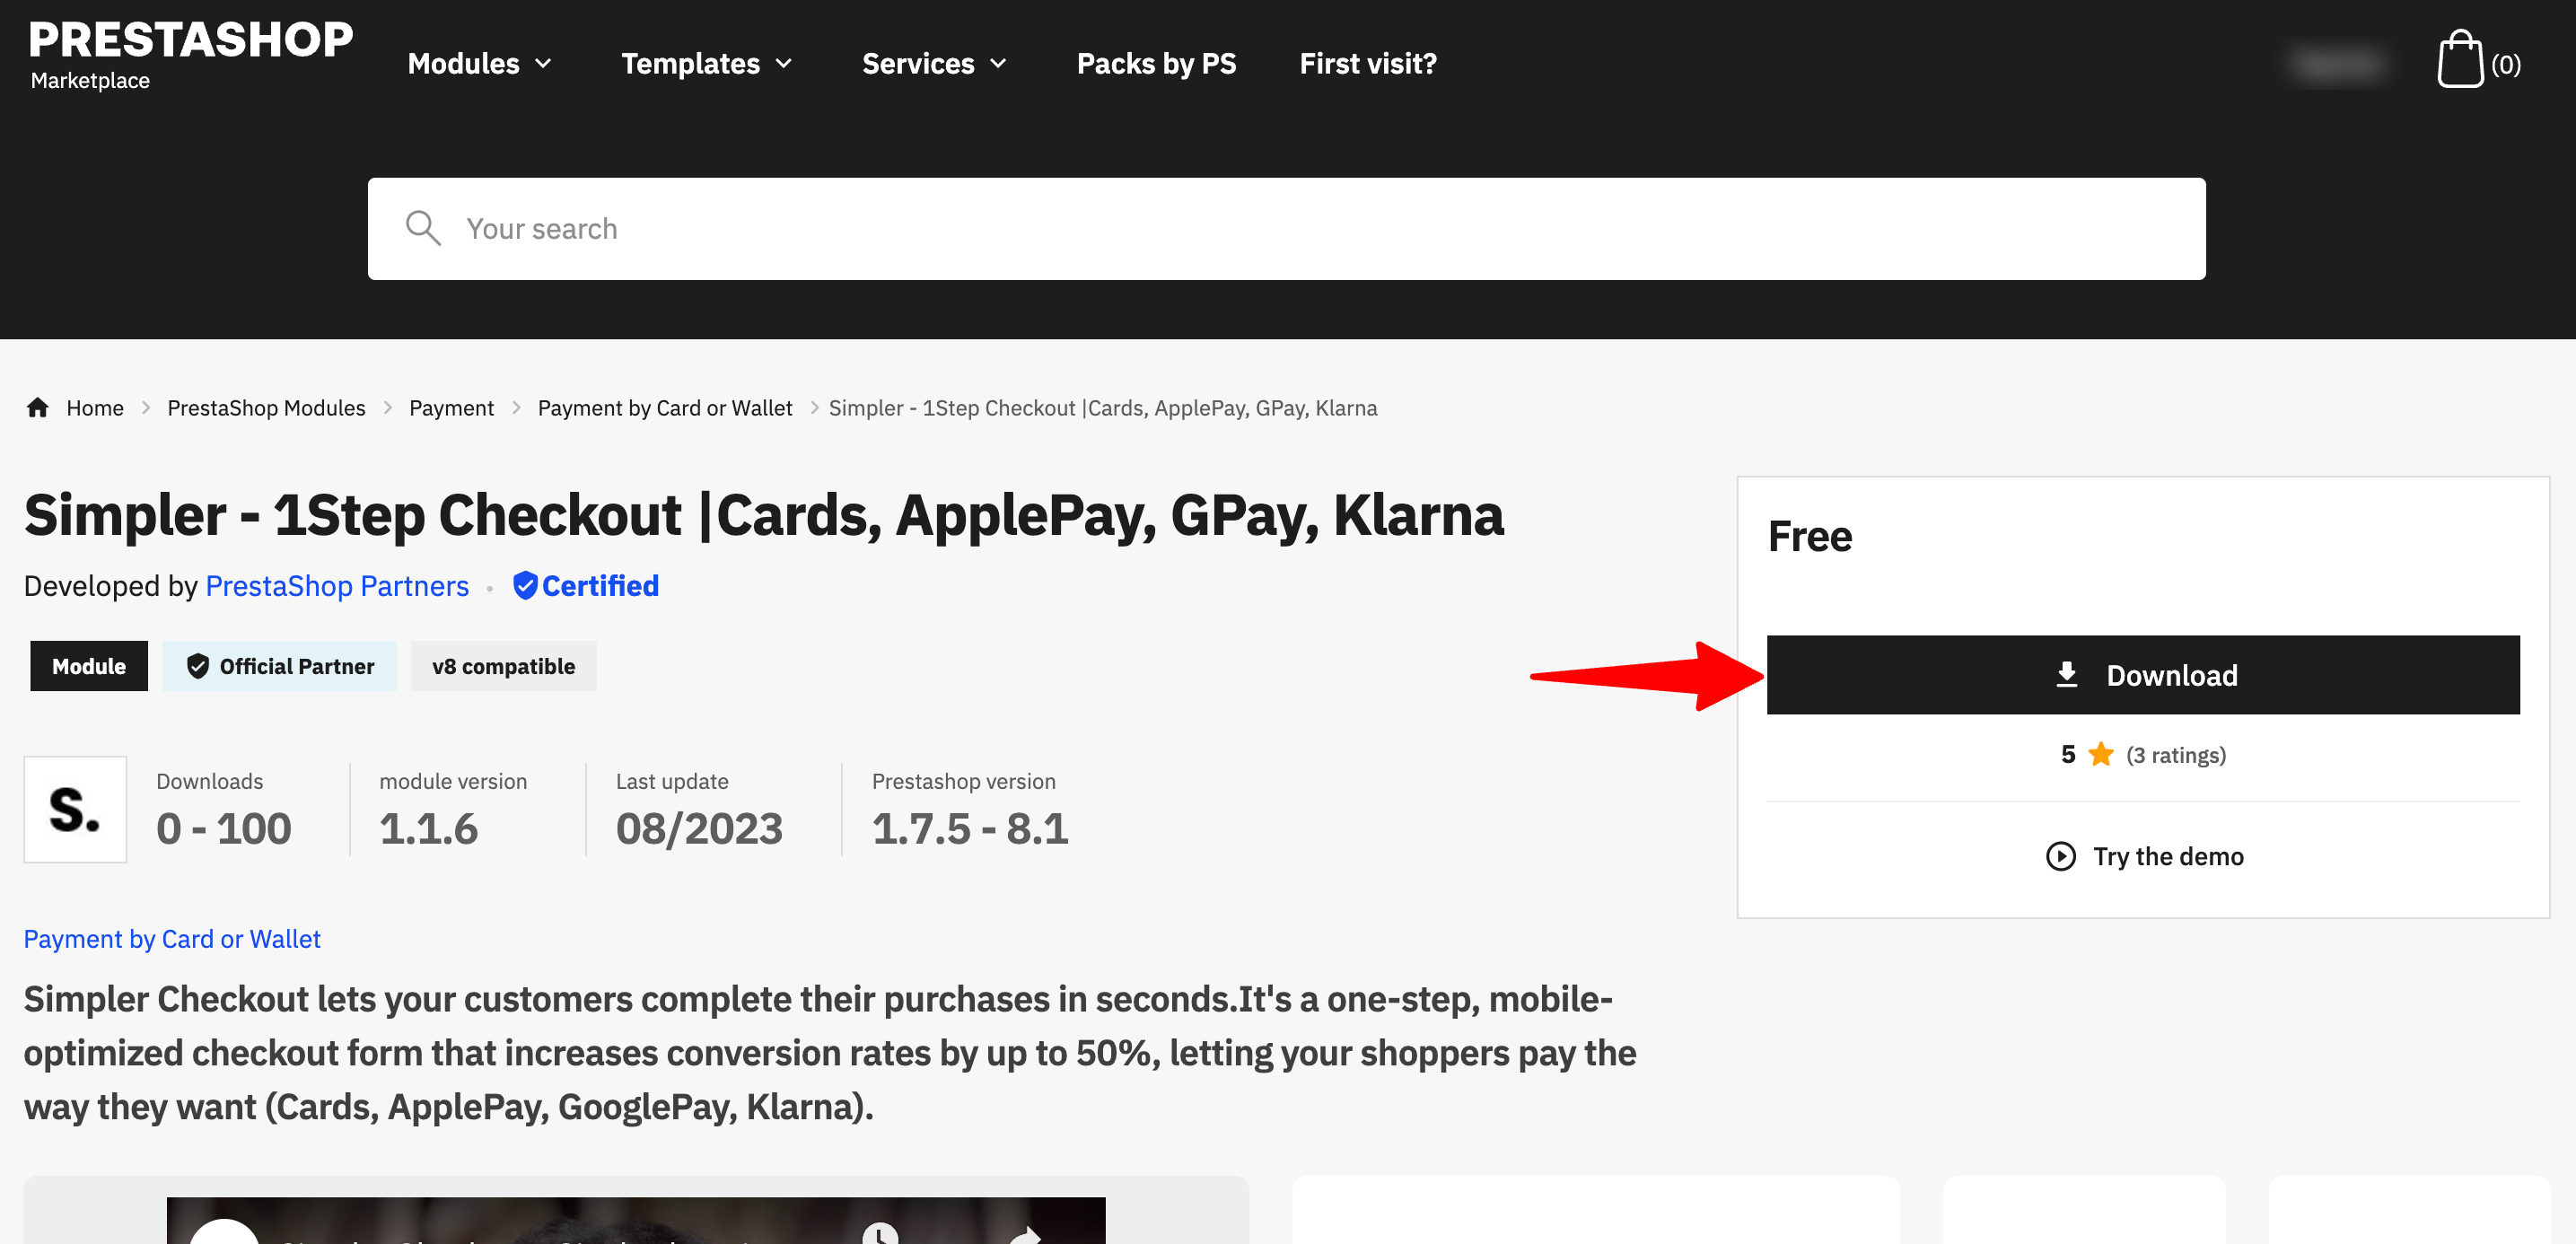
Step 1: Download our PrestaShop module from the official Prestashop Add-ons Marketplace by clicking on the Download Now link.
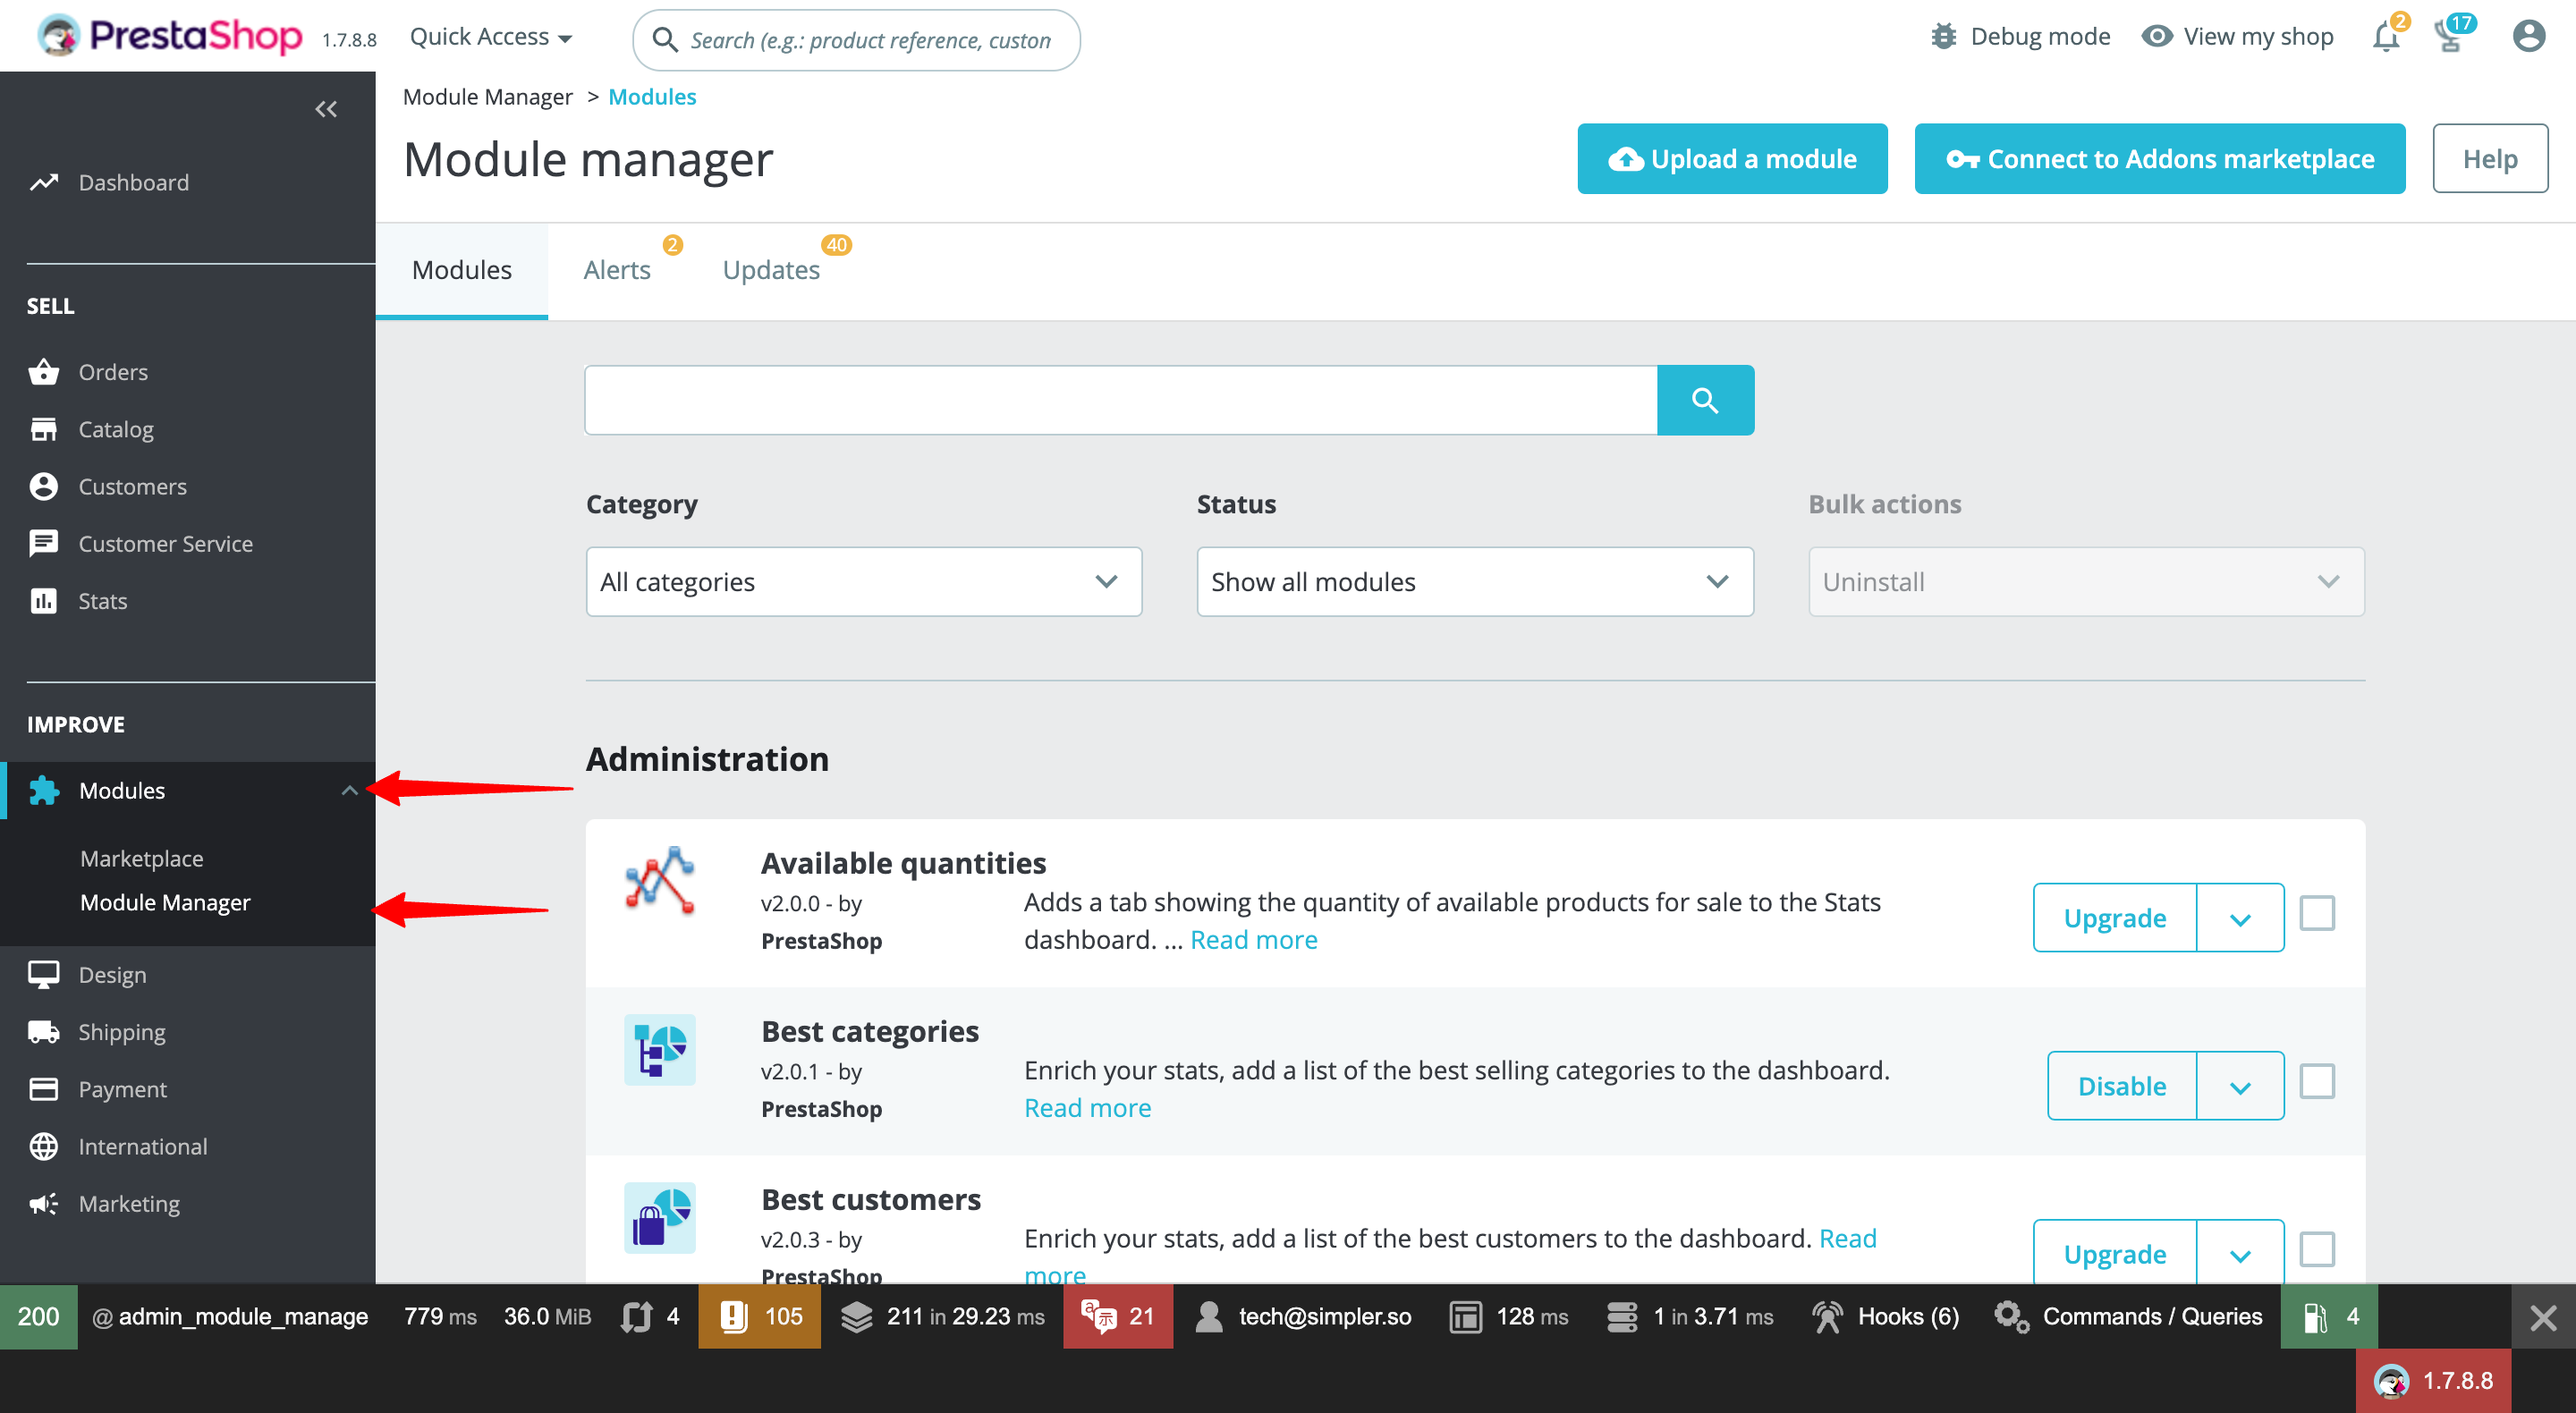
Step 2: Login to your PrestaShop admin panel, go to the "Modules" menu and select "Module Manager".
Step 3: Click the "Upload a module" button and select the downloaded file.
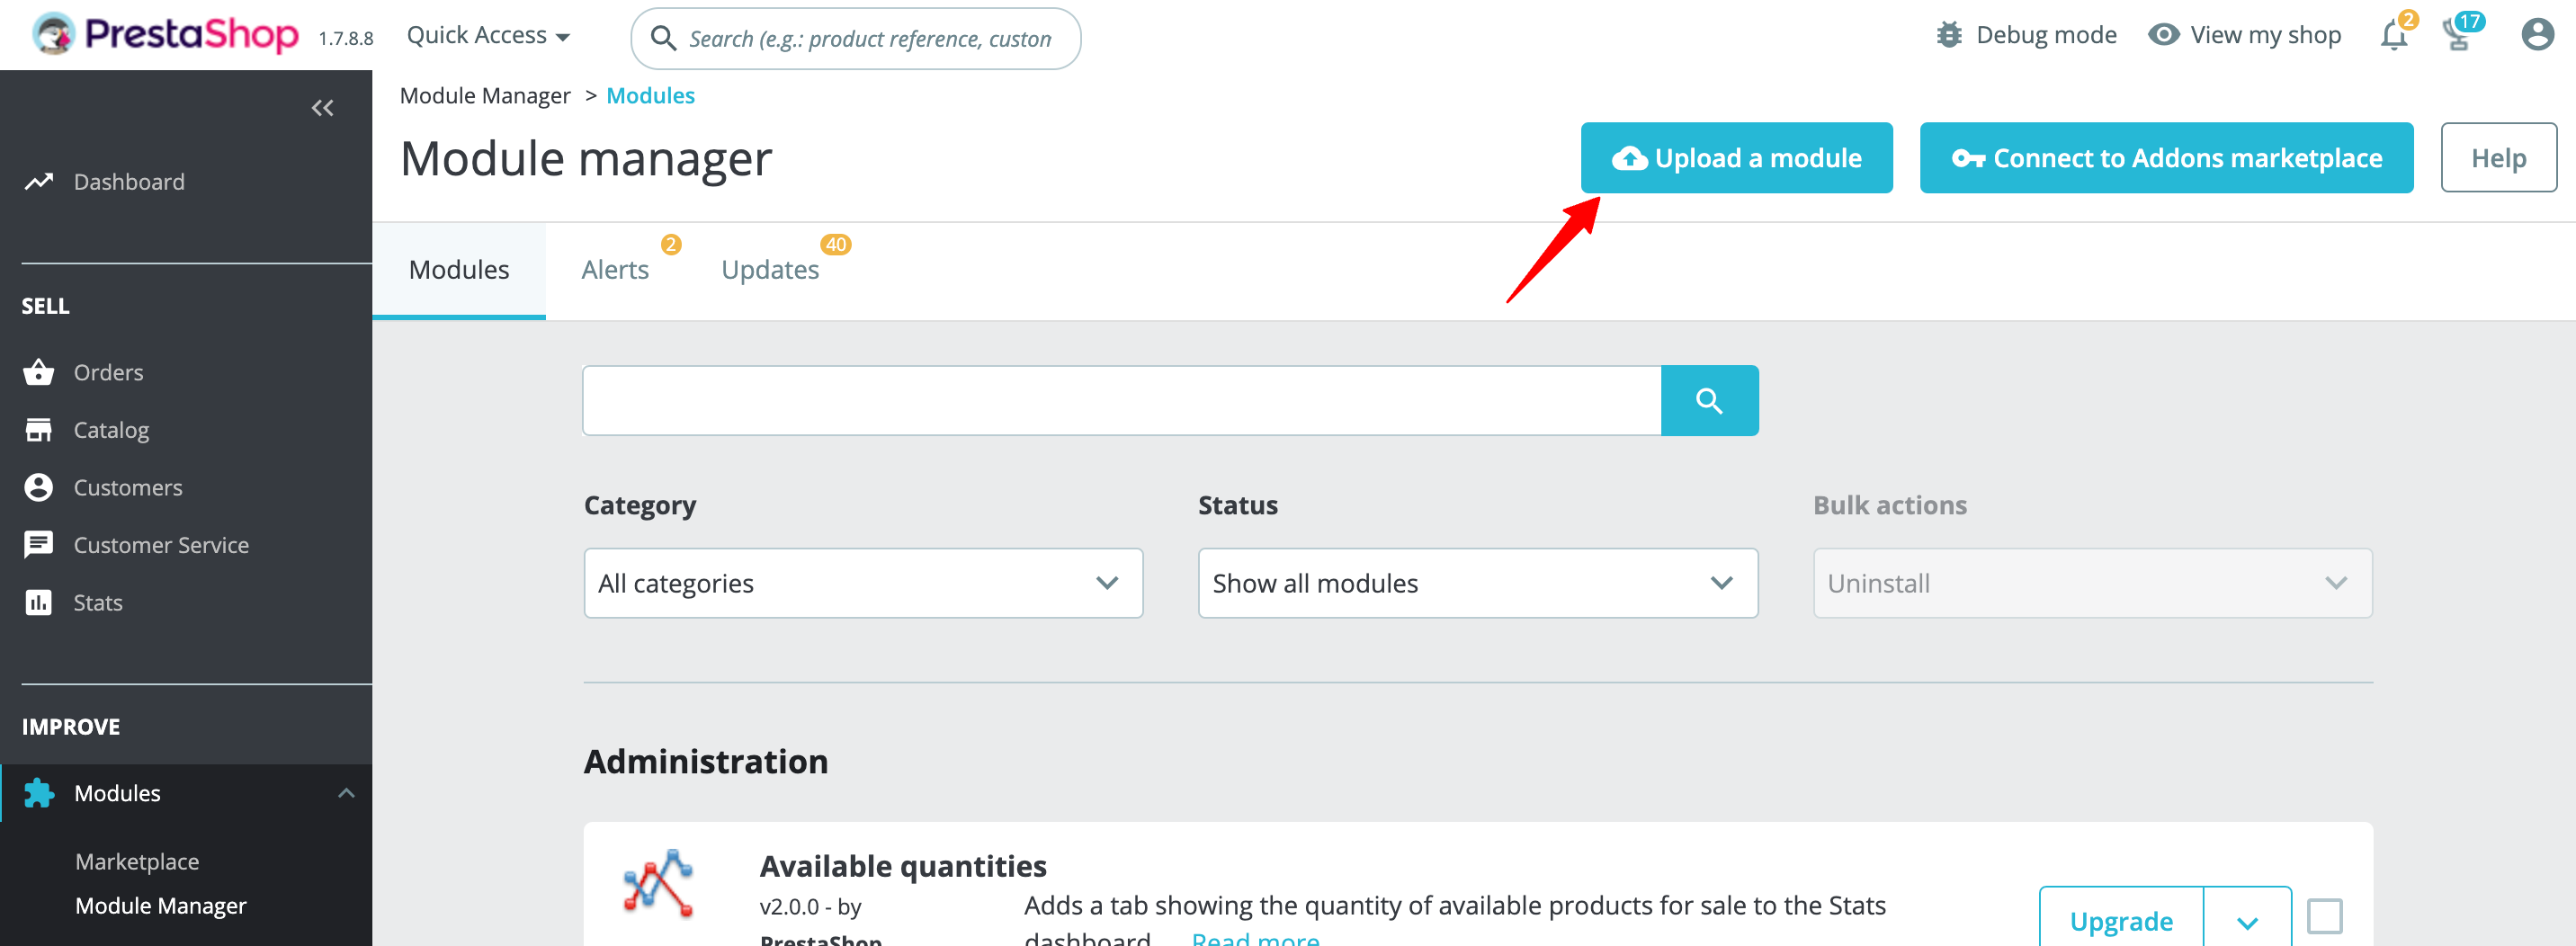
Step 4: Wait for the module to be uploaded and installed.
Once the module has been installed successfully, then you will have to configure the module (see the following section) and ensure that you are satisfied with the Simpler Button styling and positioning. [add link]
- Configure the Module
To configure the module, so that your clients will be able to complete their checkouts via Simpler:
Step 1: Go to the "Modules" menu and select "Module Manager" (if you can't find the menu, see the image in Step 2 of the previous section).
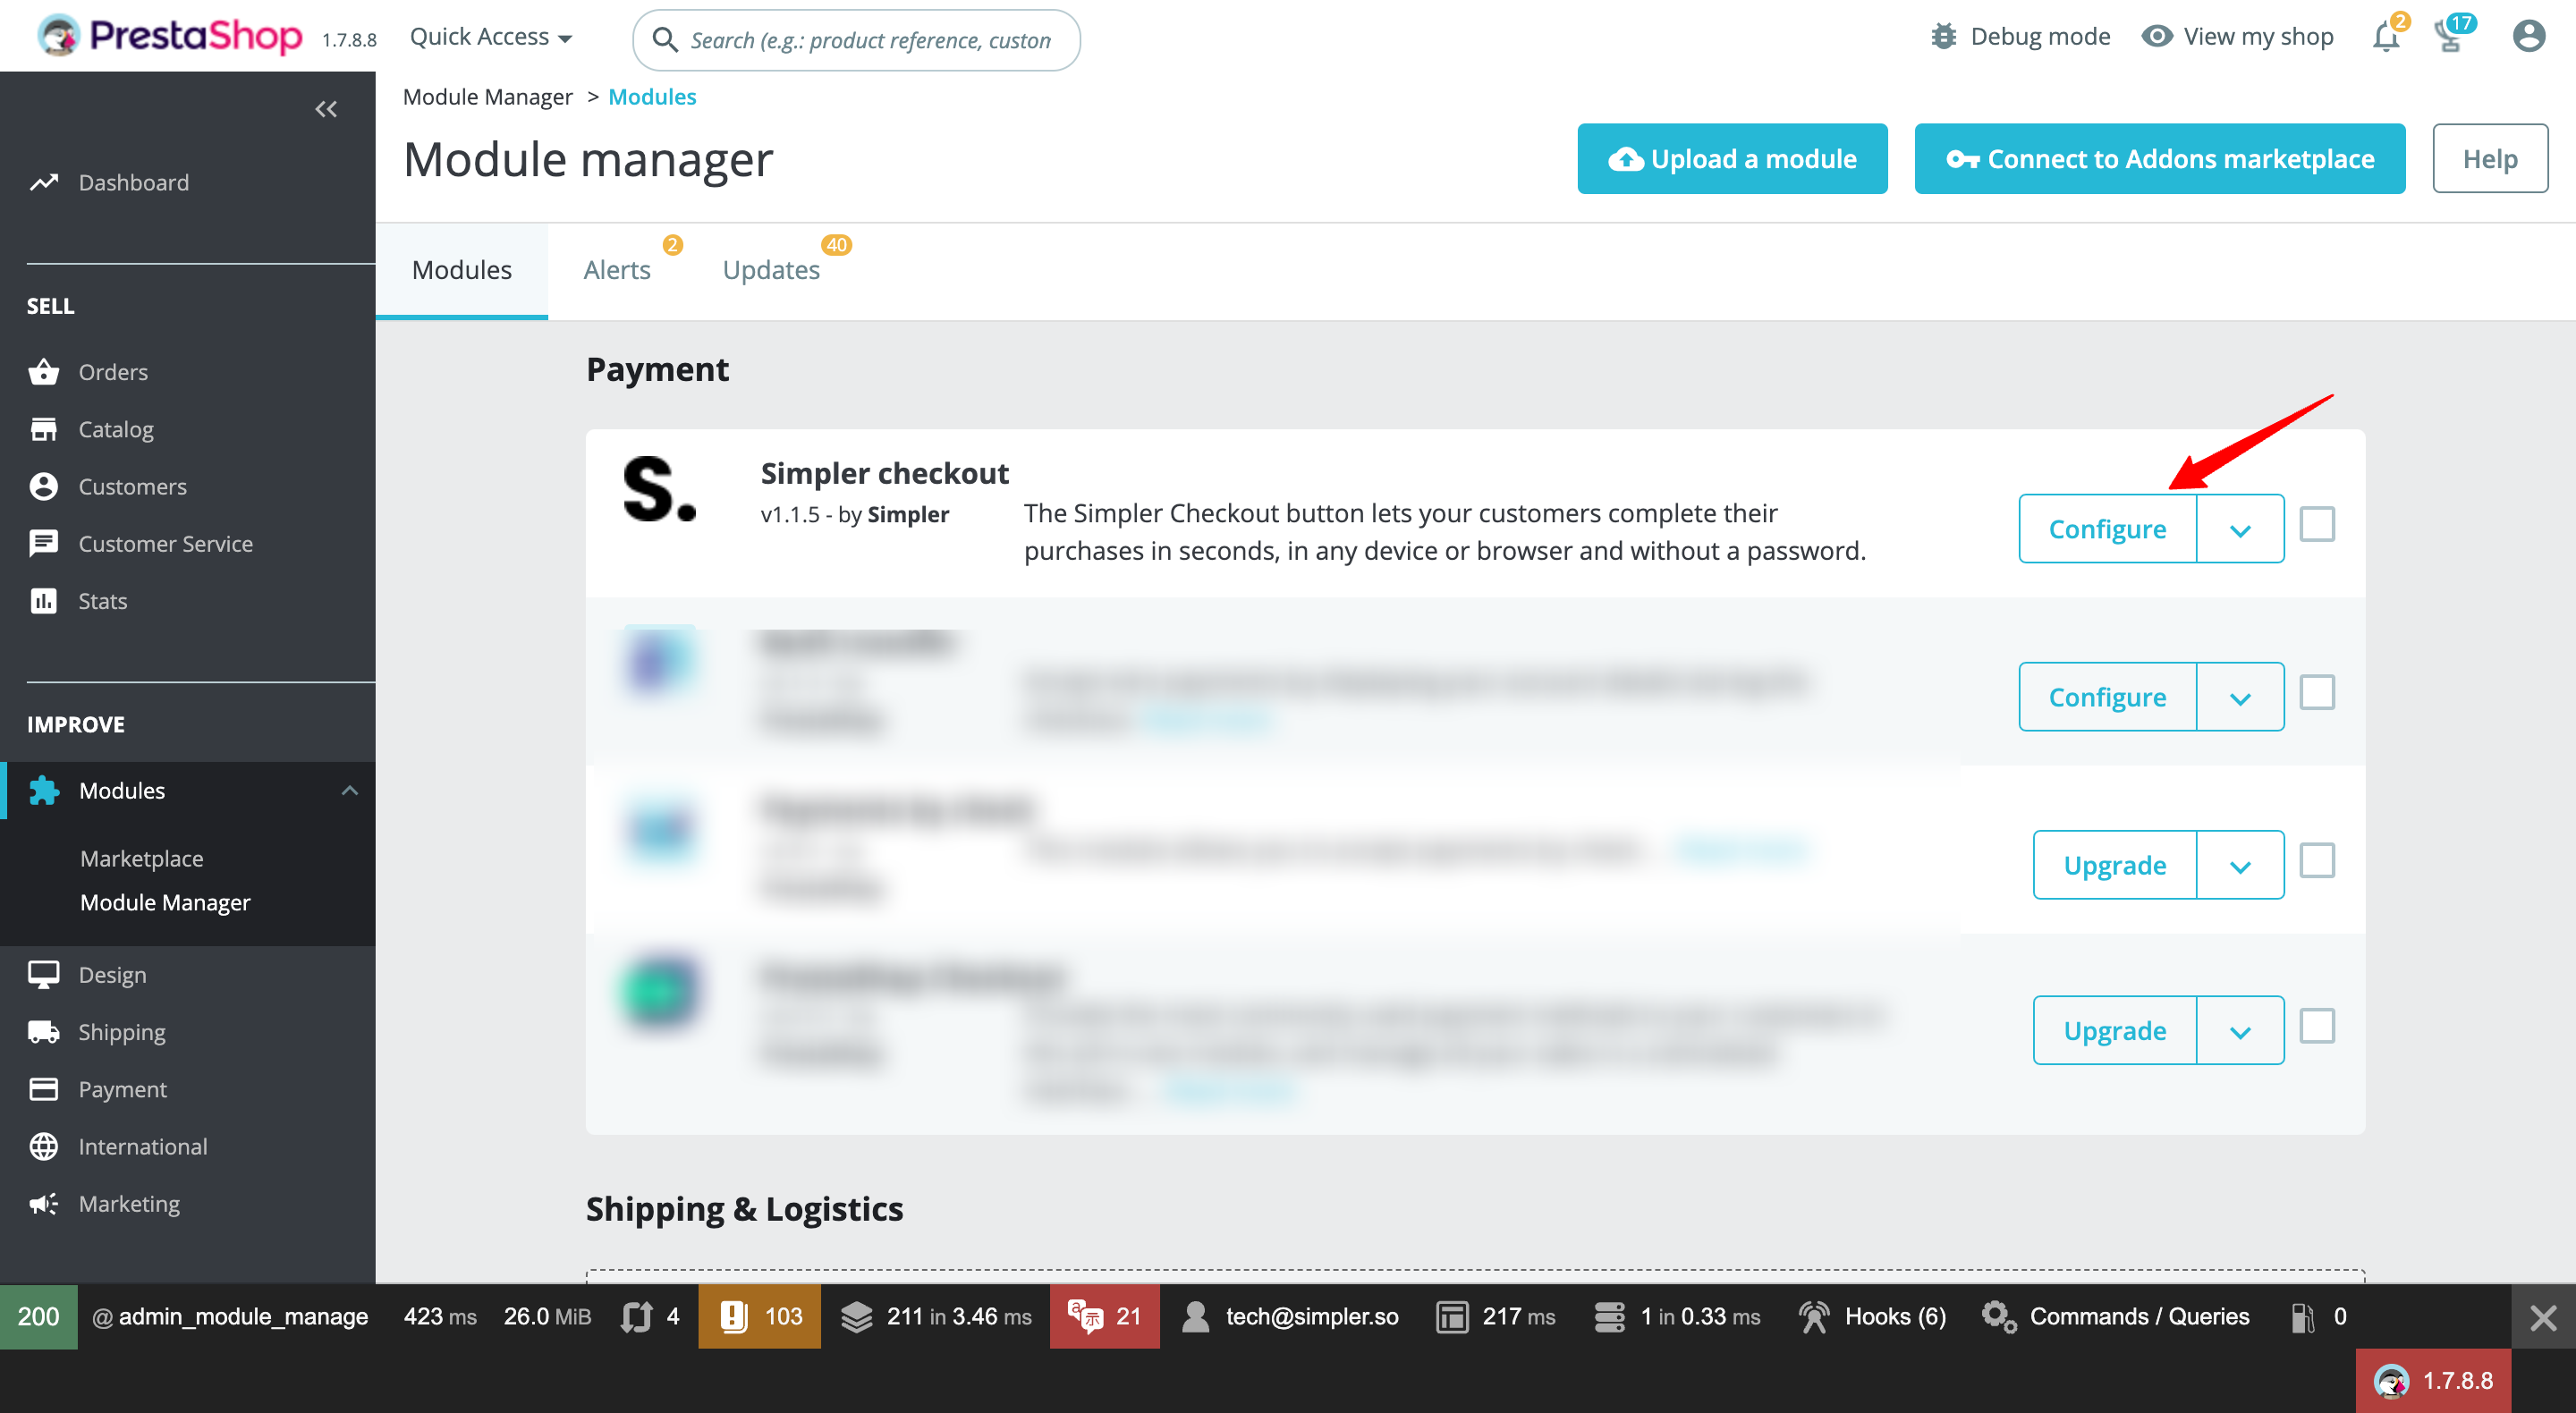
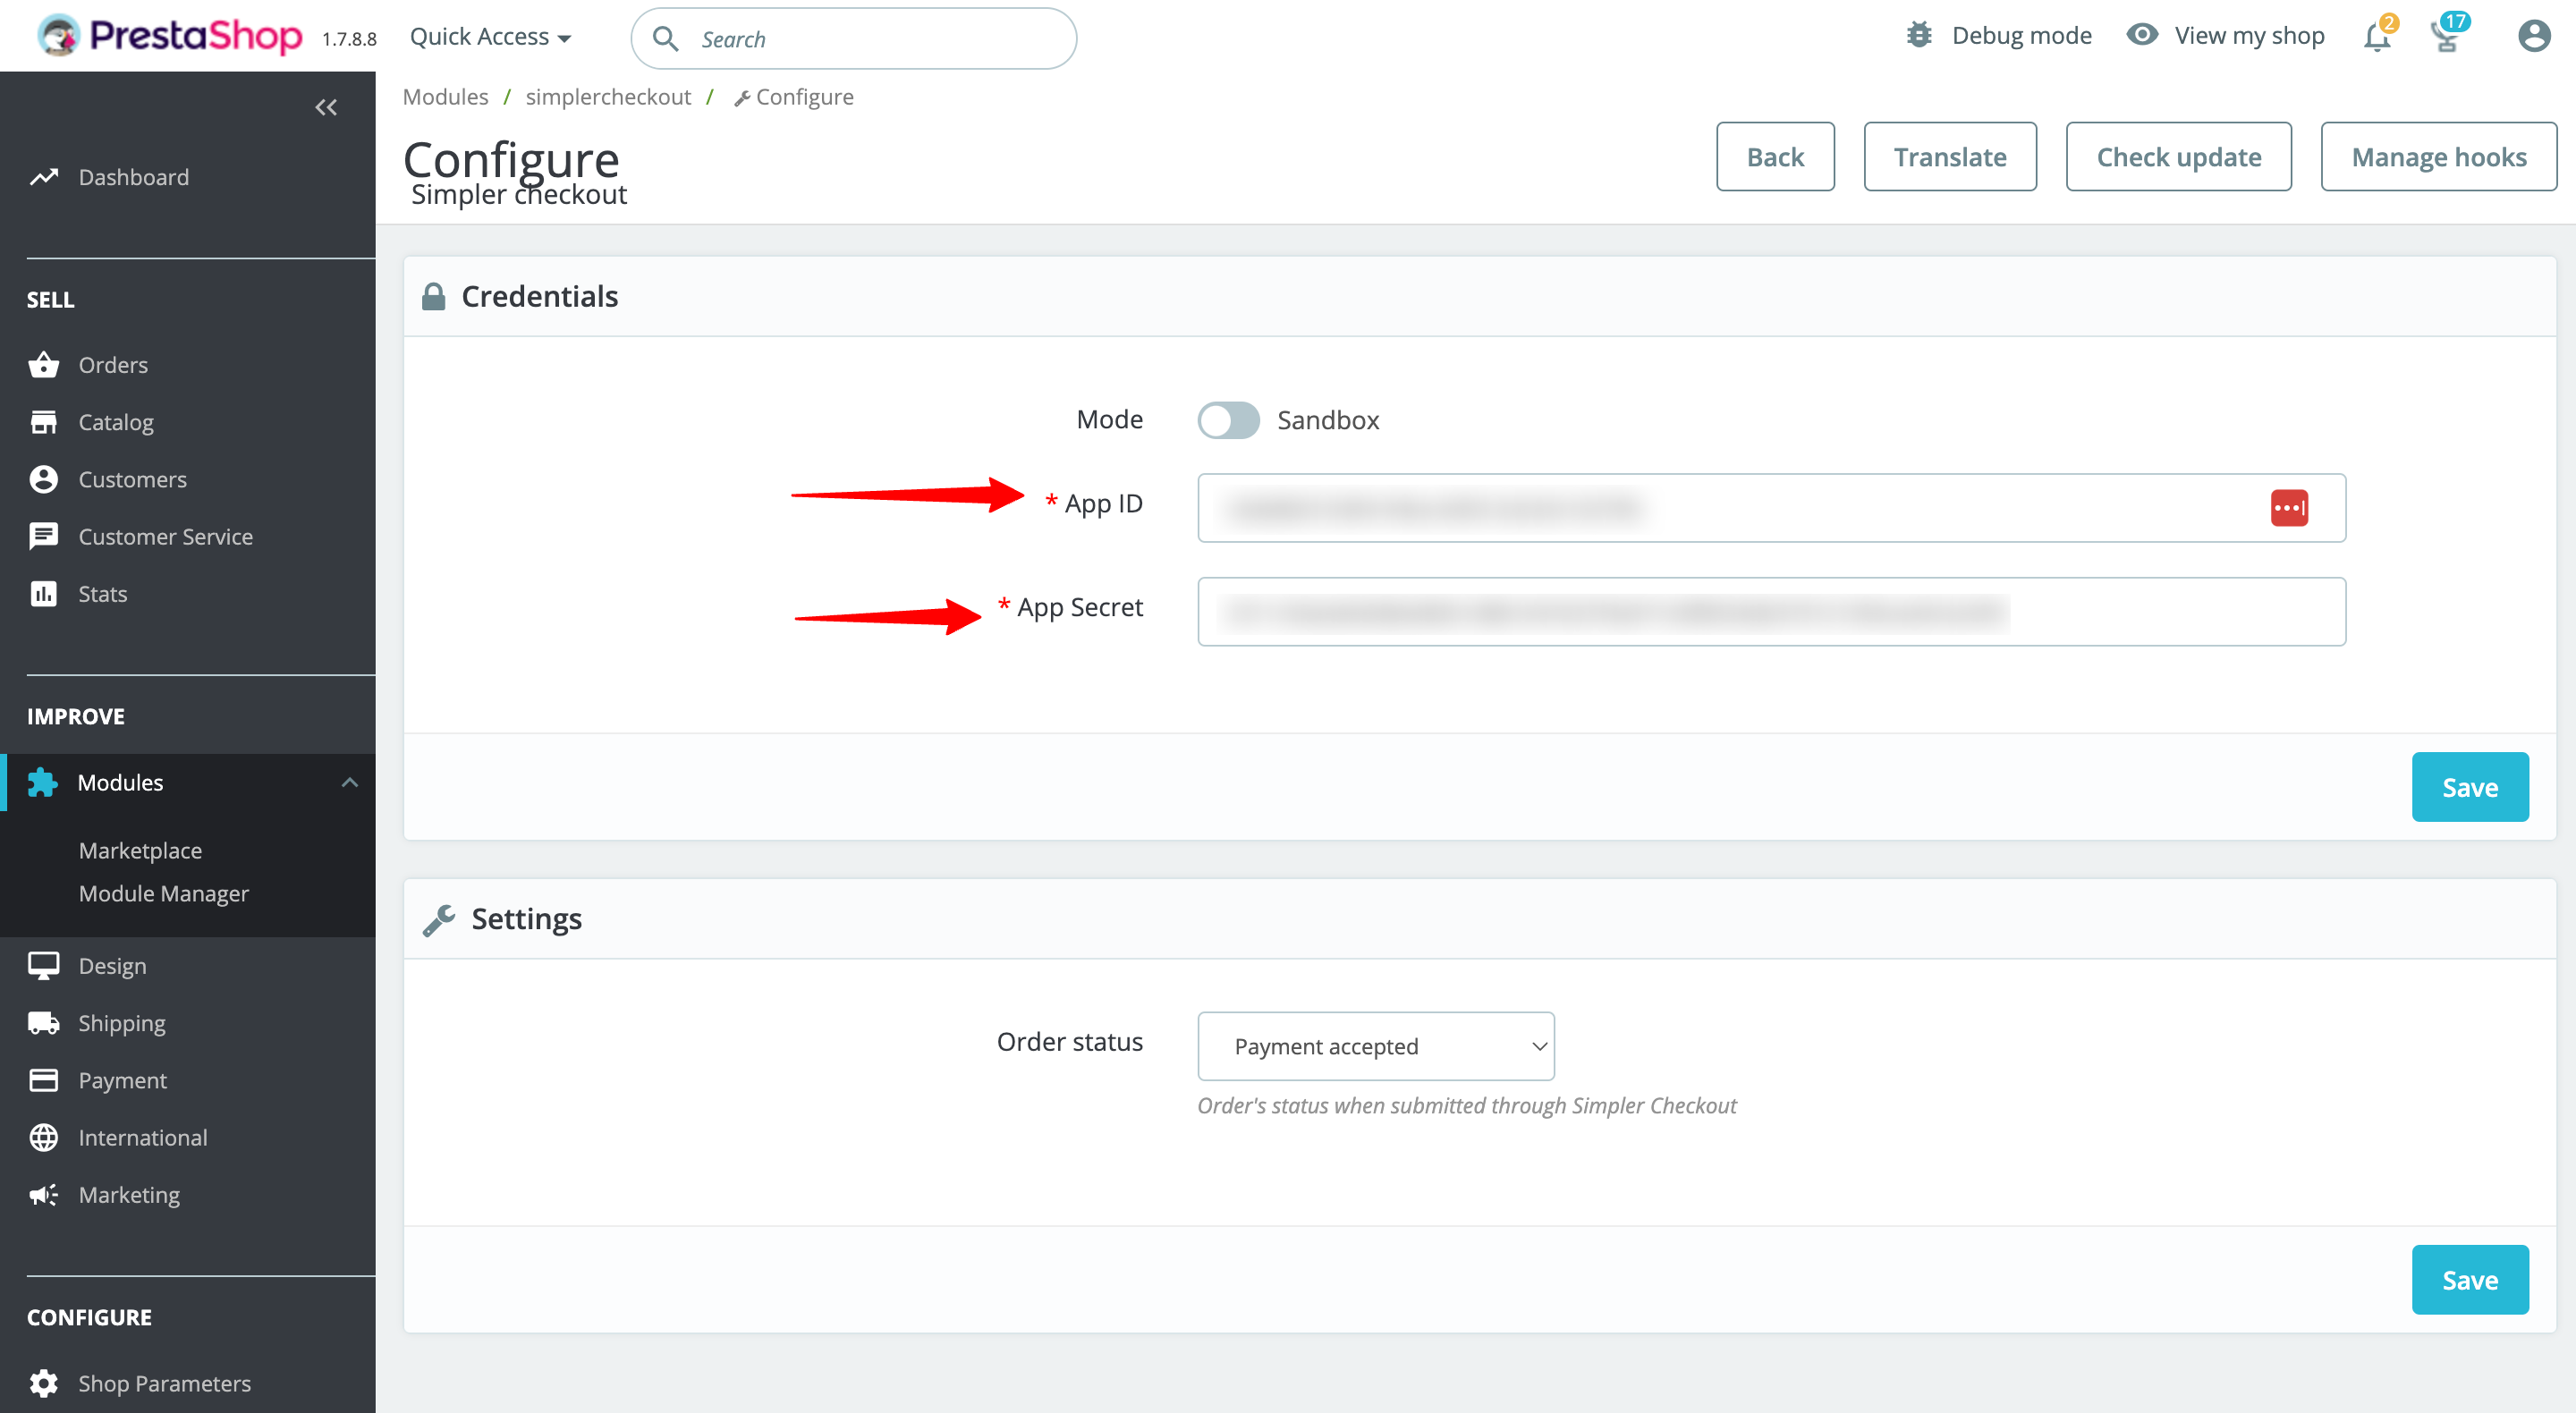
Step 2: Find "Simpler Checkout" and click the "Configure" button.
Step 3: Enter your credentials (App ID & App Secret) and select the plugin Mode.
If you do not have an App ID & App Secret, reach out to us and we will assist you immediately. For the "Simpler Button" to appear in your online store, you must add and save a valid App ID & App Secret in the configuration page.
You're ready to supercharge your customers' checkout flow!
If you wish to familiarize yourself with the button styling & positioning best practices, you may proceed to the next section of our guide. We highly recommend reviewing our styling and positioning guidelines to get the most out of Simpler.