Simpler Cross-Sell Setup Guide
Simpler Cross-Sell enables you to promote additional products directly within the Simpler checkout experience, driving higher AOV (Average Order Value) without disrupting the conversion flow. This guide walks you through configuring and optimizing cross selling for your store.
How It Works
- Cross-sell promoted products appear on the Simpler checkout page.
- Offers are curated manually by the merchant (for now).
- Shoppers can add items with one click, seamlessly updating their order summary.
Create your Cross Sell Offer
Getting your first cross sell offer live is quick and easy. We built Cross Sell to be as simple as possible, so even a non-technical merchant can launch the upsell offer.
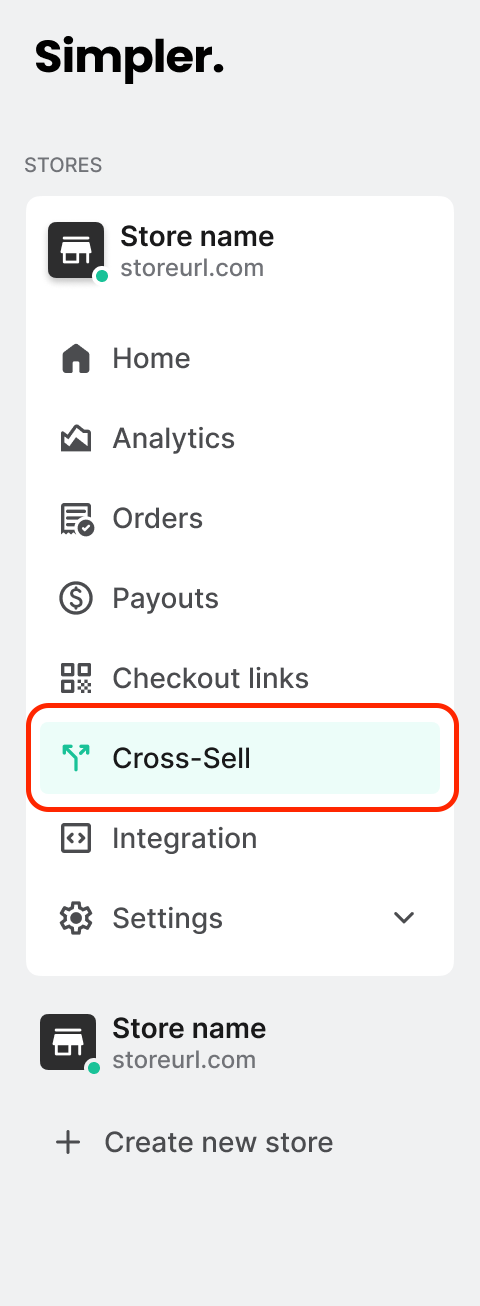
Step 1: Navigate to the Cross Sell Section
From the Simpler Merchant Dashboard, click "Cross Sell" on the left:
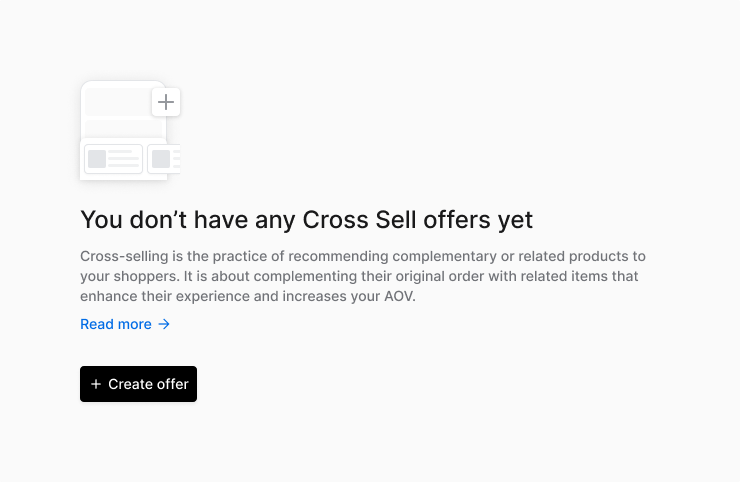
Once you are in the Cross Sell section, click the "Create offer" button to start:
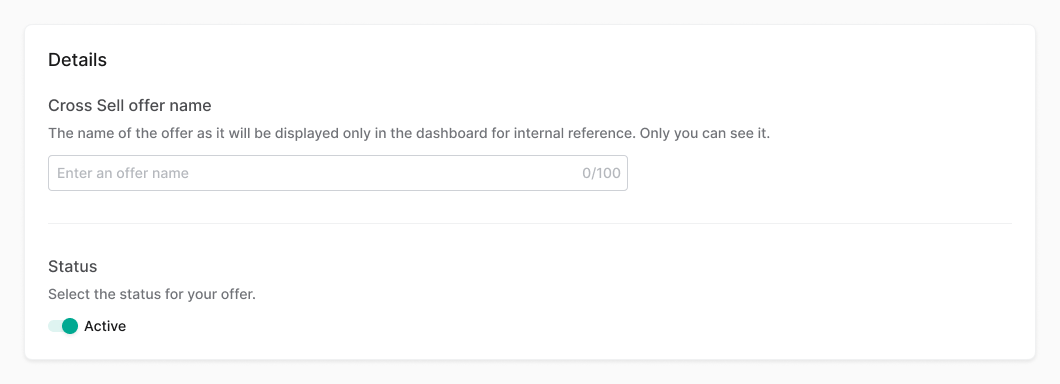
Step 2: Configure your Cross Sell Offer Details
Starting from the top.
Cross Sell offer name
Write the offer name you would like to give to this new cross sell offer.
This will be the internal name of your cross-sell offer. It will only be visible to you and your team in the Simpler Merchant Dashboard, helping you organize and manage multiple offers. Shoppers will not see this name.
Status
This toggle controls whether the cross-sell offer is active. It's turned on by default, meaning the offer will go live as soon as it's created. You can change the status at any time to activate or deactivate the offer.
Leave it on if you want your offer to go live when it's complete.
Step 3: Set the Rules that will Trigger your Cross Sell Offer
You can target all products, specific products, or entire product categories with cross sell offers. This means the offer will be shown when customers add those products to their cart; it's what triggers the cross-sell. By default, "All Products" is selected.
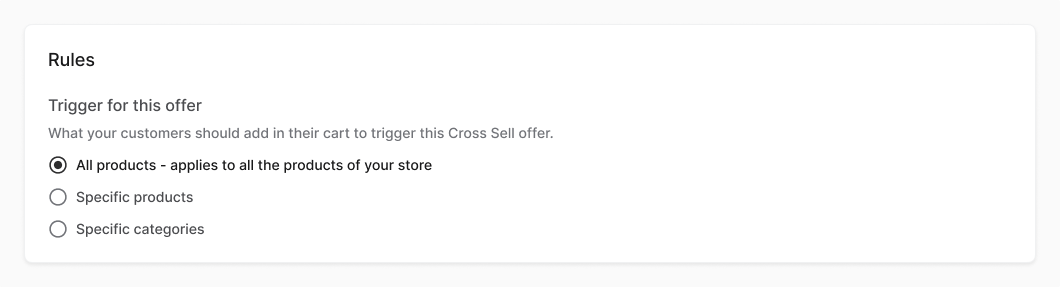
All Products
By selecting "All Products", the cross-sell offer will be triggered when a shopper adds any product from your store to their cart. This is the default option and ensures the offer is shown as widely as possible across your catalogue.
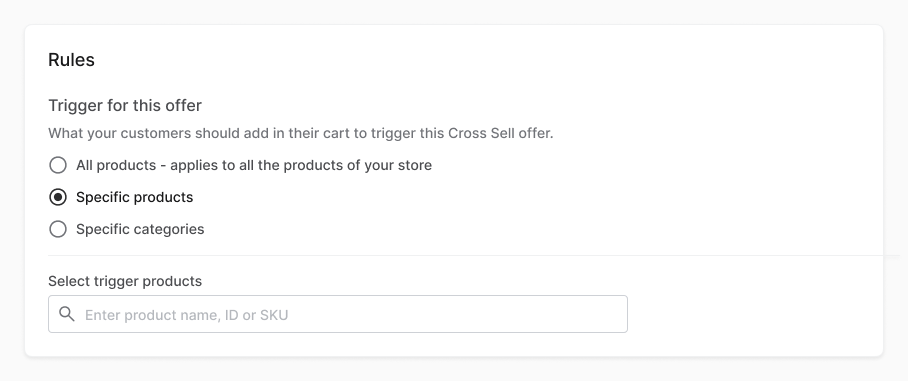
Specific Products
When you select "Specific Products", the cross-sell offer will only be triggered when a shopper adds one of the selected products to their cart. Use this option to target offers based on individual items that are most relevant or frequently paired.
To setup this rule:
1. Choose the Specific Products:
Under the "Trigger for this offer", select "Specific Products".
2. Search for products:
Click on the search input that will appear below to find specific products you want to trigger your offer.
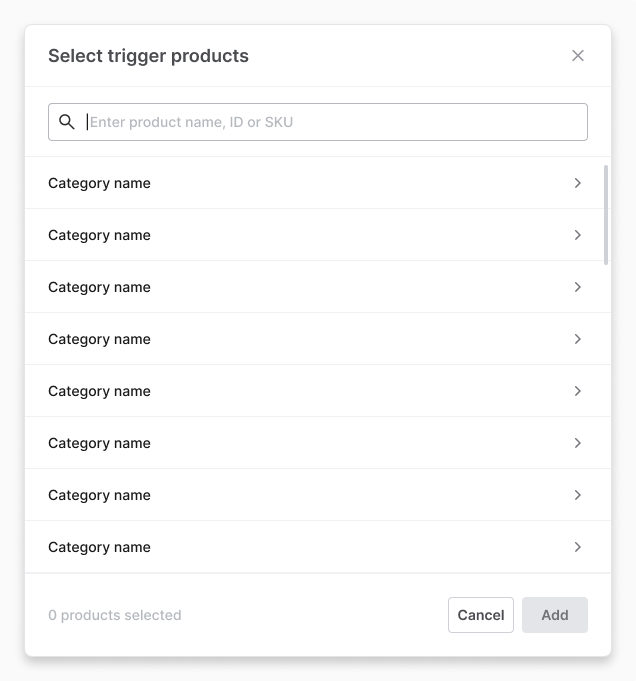
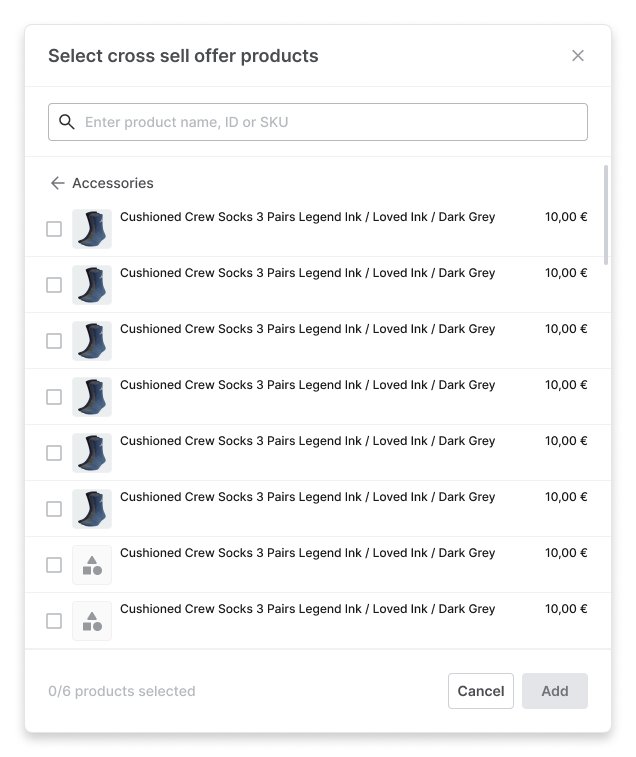
3. Select products:
In the modal, you can find products in two ways:
- Type the product name or the product ID in the search bar
- Browse by category - click to enter a category and then scroll to find the products you want
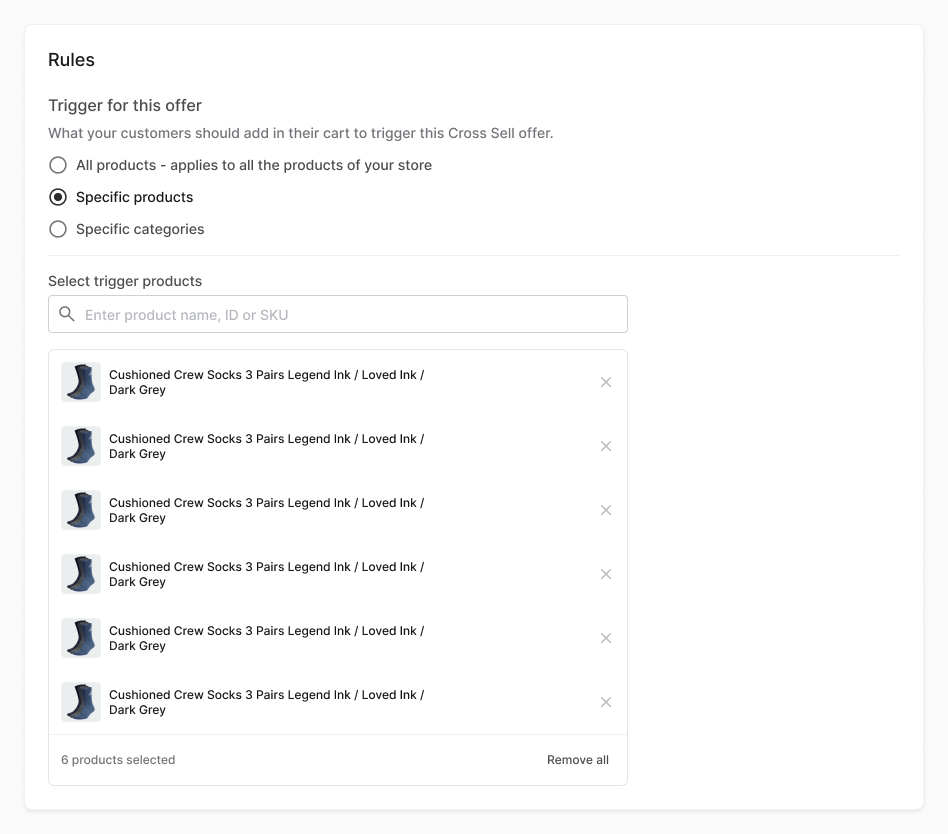
Once you have selected all the products you would like to include, click "Add". All selected products will appear below the search input. You'll also see the total number of selected items in the bottom left corner.
4. Edit Selected Products:
To remove a product, click the "X" icon next to it. If you want to start over, click "Remove All" at the bottom right of the list to clear all selected products.
Specific Categories
Selecting "Specific Categories", the cross-sell offer will be triggered when a shopper adds any product from the chosen category (or categories) to their cart. This is ideal for promoting related accessories or add-ons across an entire product range.
To setup this rule:
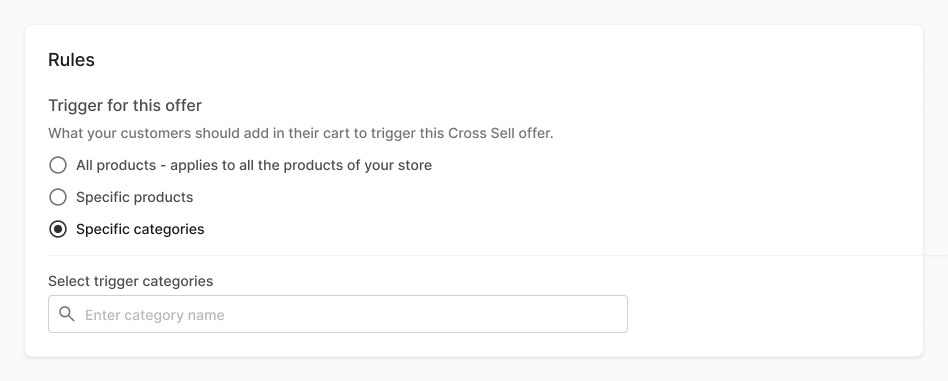
1. Choose the Specific Categories:
Under the "Trigger for this offer", select "Specific Categories".
2. Search for categories:
Click on the search input that will appear below to find specific categories you want to trigger your offer.
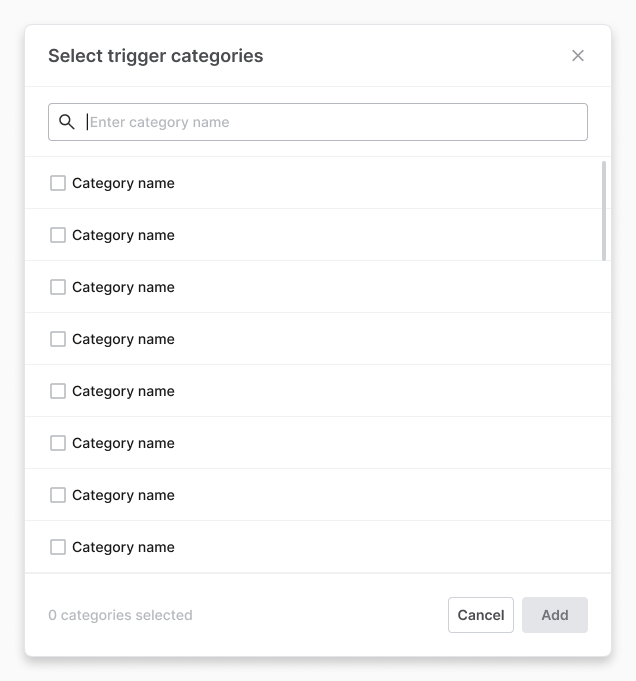
3. Select categories
In the modal, you can find categories in two ways:
- Type the category name in the search bar
- Browse by category - scroll to find the categories you want
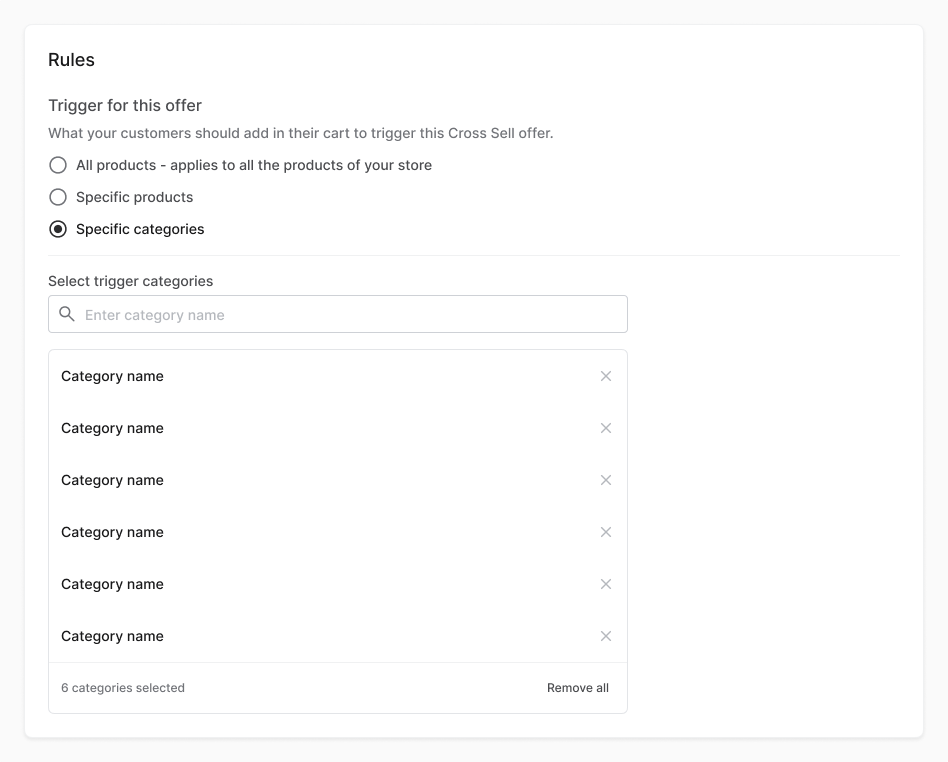
Once you have selected all the categories you would like to include, click "Add". All selected categories will appear below the search input. You'll also see the total number of selected items in the bottom left corner.
4. Edit Selected Categories
To remove a category, click the "X" icon next to it. If you want to start over, click "Remove All" at the bottom right of the list to clear all selected categories.
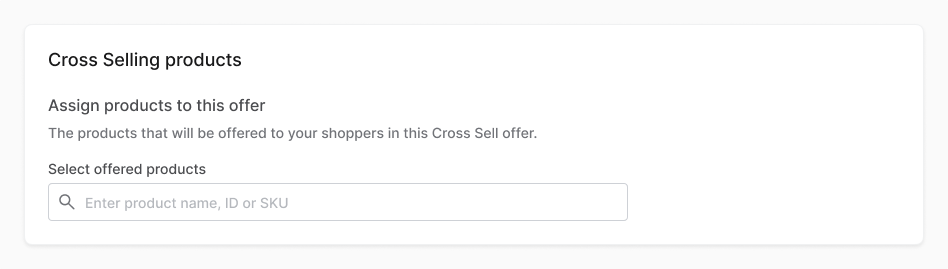
Step 4: Add Promoted Products for your Cross Sell Offer
Choose the products you want to promote as part of this cross sell offer. These are the items that will be shown to shoppers during the Simpler Checkout when the offer is triggered.
1. Search for products
Click on the search input to open the product selection modal. You can search by product name or ID, or browse by category to find and select the items you want to promote.
2. Select products
You can add up to 6 promoted products per offer. In the modal, you will find products in two ways:
- Type the product name or the product ID in the search bar
- Browse by category - click to enter a category and then scroll to find the products you want
Once you have selected all the products you would like to promote, click "Add". All selected products will appear below the search input. You'll also see the total number of selected items in the bottom left corner.
3. Edit promoted products
You can change the order in which promoted products appear to shoppers by dragging them up or down the list. The product at the top will be shown first, followed by the others in order. To drag a product, click and hold the dots on the left side of the product card.
To remove a promoted product, click the "X" icon next to it. To clear all selected products and start over, click "Remove All" at the bottom right of the list.

Step 5: Complete and Launch your Cross Sell Offer
Review all the details of your offer. Once you're happy with the setup, click "Create offer" at the bottom right corner to make it live.
If the "Status" toggle is set to "Active", your cross sell offer will start appearing to shoppers right away. When your offer is created, you will be redirected to the cross sell overview page.
After Publishing your Cross Sell Offer
Once your cross-sell offer is live, you can always go back to edit it, pause it, or delete it entirely. You can also monitor its performance in the dashboard to see how it's converting and make improvements as needed.
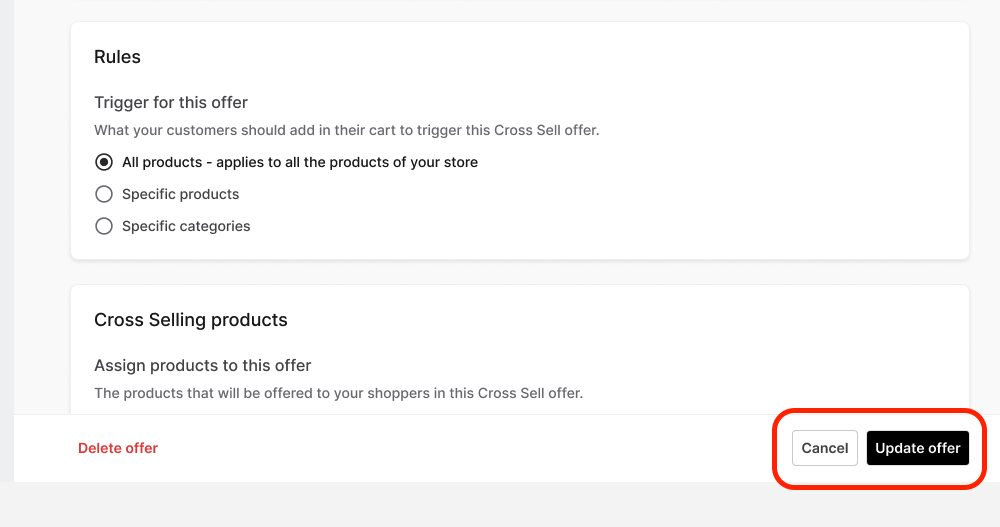
Edit an Offer
To edit an offer, go to the Cross Sell overview page and click on the offer name. This will open the offer in edit mode. From there, you can make any necessary changes. When you're done, click "Update Offer" to save and apply your changes.
You can instantly change the status of an offer from the overview page by simply clicking on the toggle button to the right of each order. Confirm your action by clicking "Deactivate" in the confirmation modal.
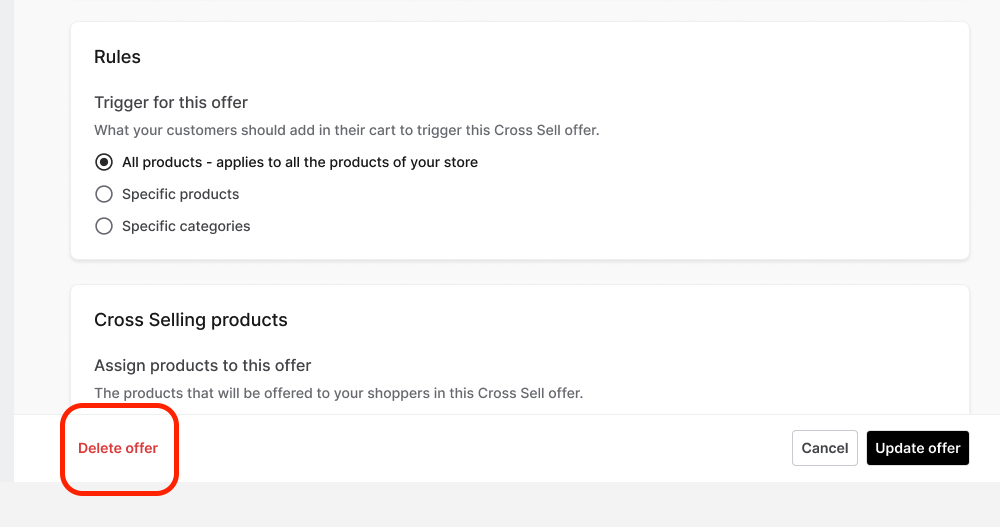
Delete an Offer
To delete an offer, go to the Cross-Sell overview page and click on the offer name. This will open the offer in edit mode. Click the "Delete offer" button at the bottom left of the page. Confirm the action by clicking "Delete" in the confirmation modal.
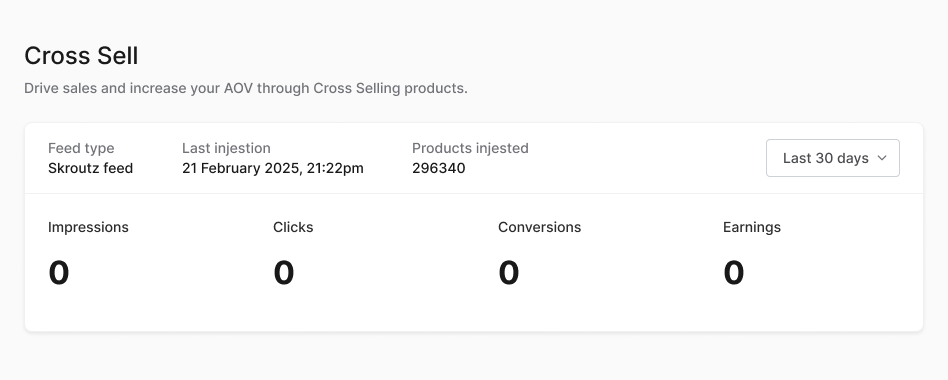
Monitor Offers Performance
You can track how your cross-sell offers are performing directly in the Cross-Sell overview page. We provide aggregated analytics across all your active and past offers.
The following key metrics are available:
- Impressions – How many times your cross sell offers were shown to shoppers
- Clicks – How many times shoppers clicked on
- Orders – The number of completed orders that included a cross sell product
- Earnings – The total revenue generated from cross sell offers alone
You can view performance across different timeframes, including All Time, Yesterday, Last 7 Days, Last 15 Days, Last 30 Days (set as default), Last 60 Days, and Last 90 Days, helping you understand trends and optimize your offers over time.