Installation Guide
You need an API Key & Secret to be able to complete this guide.
If you don't have your API Key & Secret yet, check out our Get Started With Simpler guide.
Login to your admin panel
After getting your API Key & Secret, login to your store's admin panel to install and configure the Simpler plugin.
Where can I find my store's admin panel?
You can find your store's admin panel at https://SELLER_STORE_URL/wp-admin. So if your store is served through https://acme.com, the admin panel will be at https://acme.com/wp-admin.
Find & Install the Plugin from the Wordpress Plugin Registry
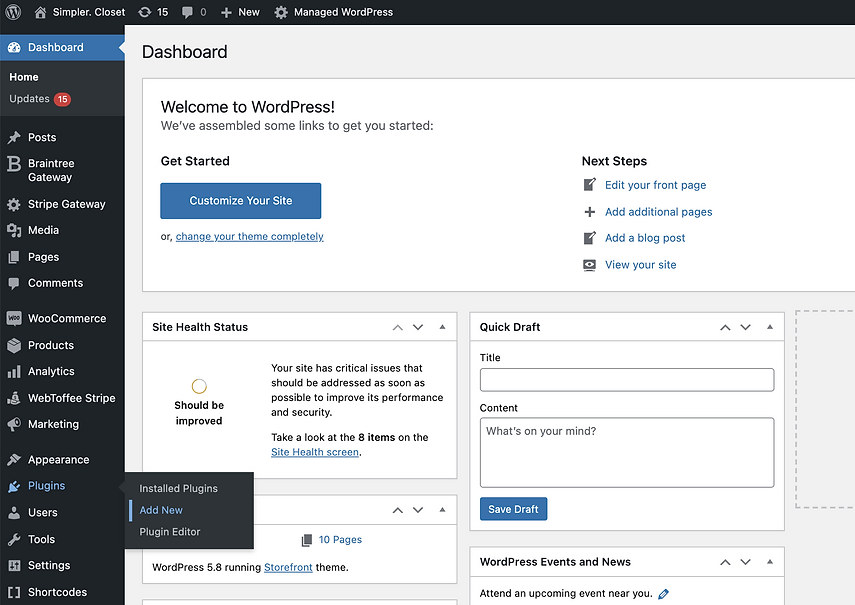
In your dashboard's left sidebar, navigate to Plugins -> Add New

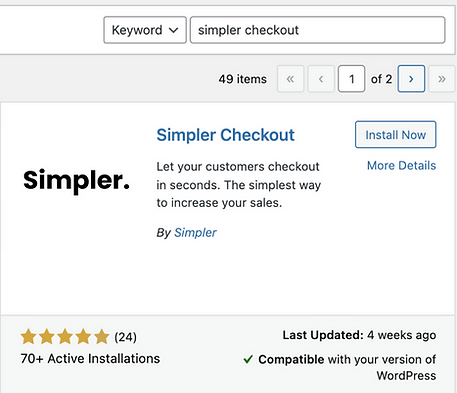
From the plugins page, search for "Simpler Checkout" and click on "Install Now"

Activate the Plugin
From the Plugins page, find the Simpler Checkout plugin and click on "Activate". If it is already activated, skip to the next step.

Once the plugin is activated, make sure "Automated Updates" are enabled and then click on "Settings".
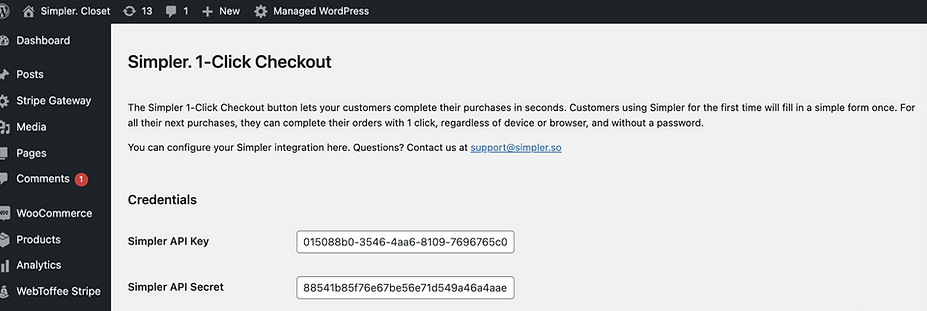
Add the API Key & Secret in the settings page and click on "Save Changes".

Authorize Simpler to access WooCommerce
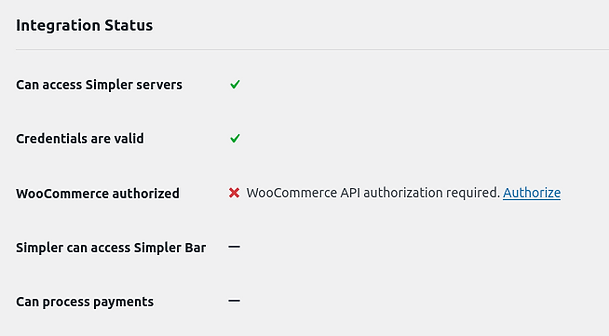
Once you've saved your changes, you should see the "Integration Status" panel change. It should now fail the "WooCommerce authorized" step, with a link called "Authorize".
Click on the Authorize button and follow the authorization process instructions to allow Simpler to place orders on your customers' behalf to your store.

Disable Test Mode

That's it! You've now installed the Simpler Checkout plugin to your store.
The plugin is in "Test Mode" by default, meaning that only logged in administrators (like you!) will see the Simpler Checkout button.
By unchecking Test Mode and saving your changes, the button will be visible to all your shoppers, allowing them to checkout in seconds.
In the next chapter we'll take a look on how you can customize the positioning & behavior of the Simpler Checkout button.